
Quickstart
From sign-up to your first paid order, in the order Sofra expects you to do things.
This walkthrough takes a brand-new account to a working restaurant. Allow around an hour. Each step links to the full guide.
Before you start
- An email address you can open (a verification link is sent to it).
- Your restaurant’s name, country and currency.
- A rough list of your menu, tables and staff (you can add more later).
Set up in nine steps
- 1
Create your owner account
Open the Sofra portal and choose Sign up. Enter your name, email, a password of at least 8 characters, country, phone number with country code, and accept the terms. See Account & owner portal.
- 2
Verify your email
Click the link in the email we send (valid for 24 hours). Until you verify, you can only view your account or ask for a new link.
- 3
Add your restaurant
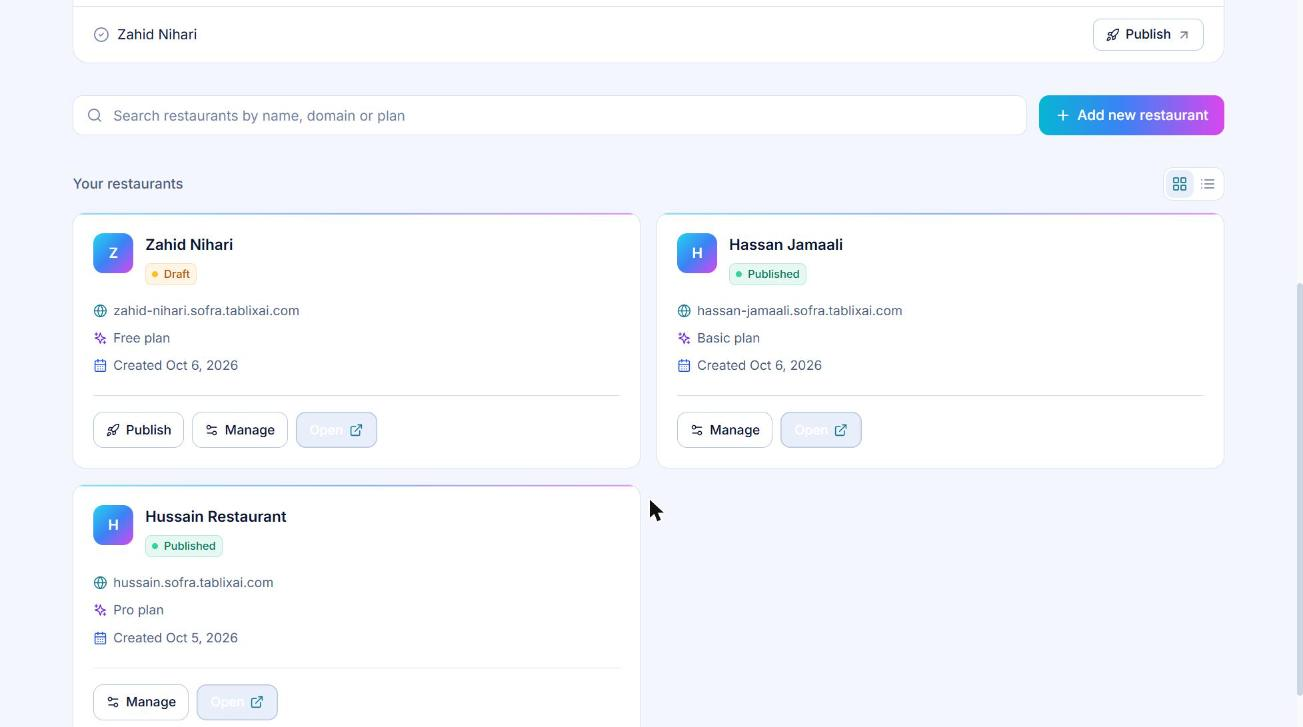
In the portal choose Add new restaurant. Enter the name, pick a free subdomain (3 to 30 letters, numbers or dashes), your country and currency. Sofra creates the restaurant as a draft with one default branch called *Main Branch*.
- 4
Publish and open it
Choose Publish to make the restaurant live, then Open to sign in to it as the owner. Until you publish, your address shows a coming-soon page and staff cannot sign in.
- 5
Set up your branch and floor
Fill in the branch details (hours, timezone, order prefix), add floor areas and tables, and arrange them on the floor plan. See Branches and Floor areas, tables & floor plan.
- 6
Build your menu
Create a menu, add categories, then items with prices, and add modifier groups for sizes and extras. See Menu catalog.
- 7
Configure money rules
Add taxes, service charges and payment methods (Basic and above). See Taxes & service charges and Payment methods.
- 8
Invite your team
Add staff, choose a role for each, and give them access to the right branches. See Staff, roles & departments.
- 9
Take your first order
Open Orders → New order, pick a table, add items, send to the kitchen, then take payment. See POS & orders.
Your first order, end to end
- 1
Choose the channel
Pick Dine-In and select a table. (For other channels see POS & orders.)
- 2
Add items
Tap items. If an item has modifier groups, choose the options; add a note such as “no onions”.
- 3
Send to the kitchen
Choose Send to Kitchen. Items appear on the kitchen screen and, if you configured print rules, print on the right printer.
- 4
Request the bill and pay
When the guests are done, request the bill, then Pay. Split between several payment methods if needed.
- 5
Print the receipt
The order completes, the table frees up and the sale is recorded. Print the receipt from the order page.
What to set up next
Ready to try it?
Create a free account and follow along.