
POS & orders
Build and send orders across eight channels, with modifiers, notes, discounts, coupons and live totals.
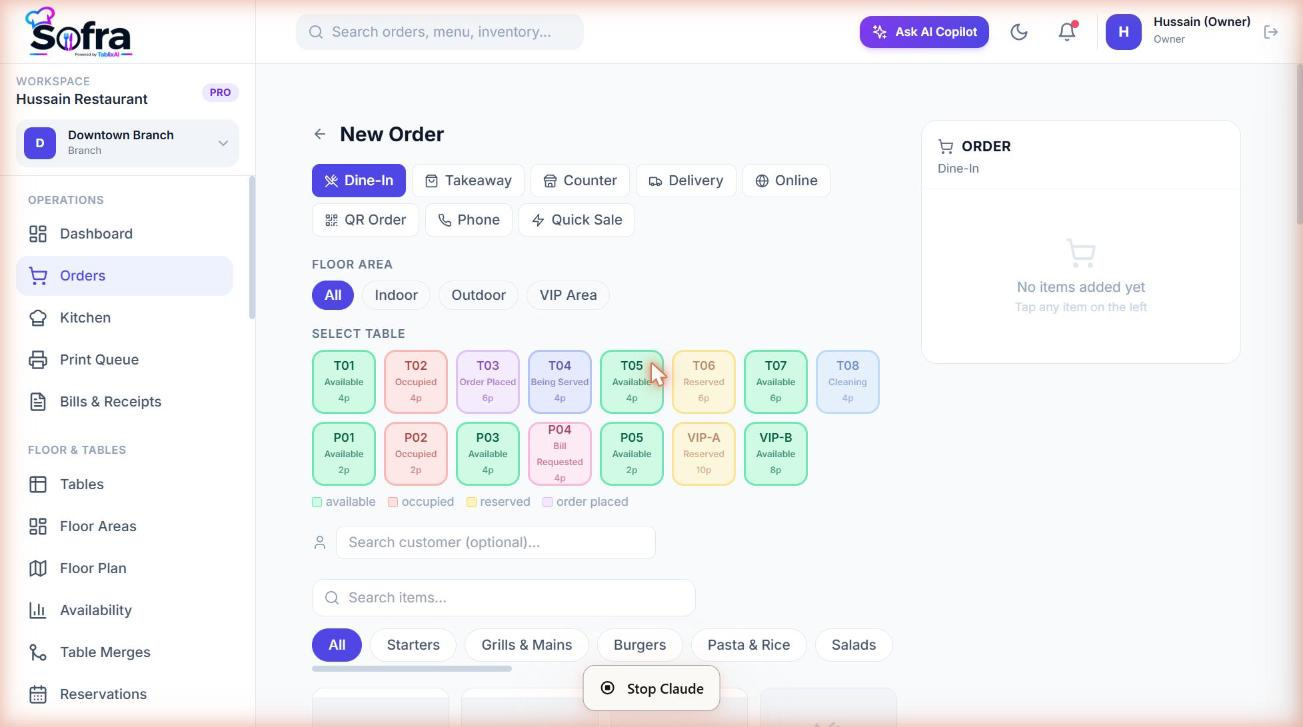
Orders are created from Operations → Orders → New Order. The screen has the menu on the left and the order on the right, and it recalculates taxes, service charges and totals live as you add items.
Choose a channel
Pick a channel at the top. The channel decides which fields appear, which taxes and service charges apply, and which menu items and prices are shown.
| Channel | What you must provide | Notes |
|---|---|---|
| Dine-In | A table | Placing the order marks the table occupied. |
| Takeaway | Optional customer | Pickup slip can be printed when ready. |
| Counter | Optional customer | Quick pay at the counter. |
| Delivery | Delivery address (street required), optional area, city, phone, fee and instructions | A packing slip can be printed when ready. |
| Online | As delivery | For orders arriving through your website. |
| QR Order | A table | Dine-in orders tagged as QR source. |
| Phone | As delivery | Orders taken by phone. |
| Quick Sale | Nothing | Fastest path for simple sales. |
Adding items
- 1
Find the item
Browse by category or use the Search items box.
- 2
Choose options
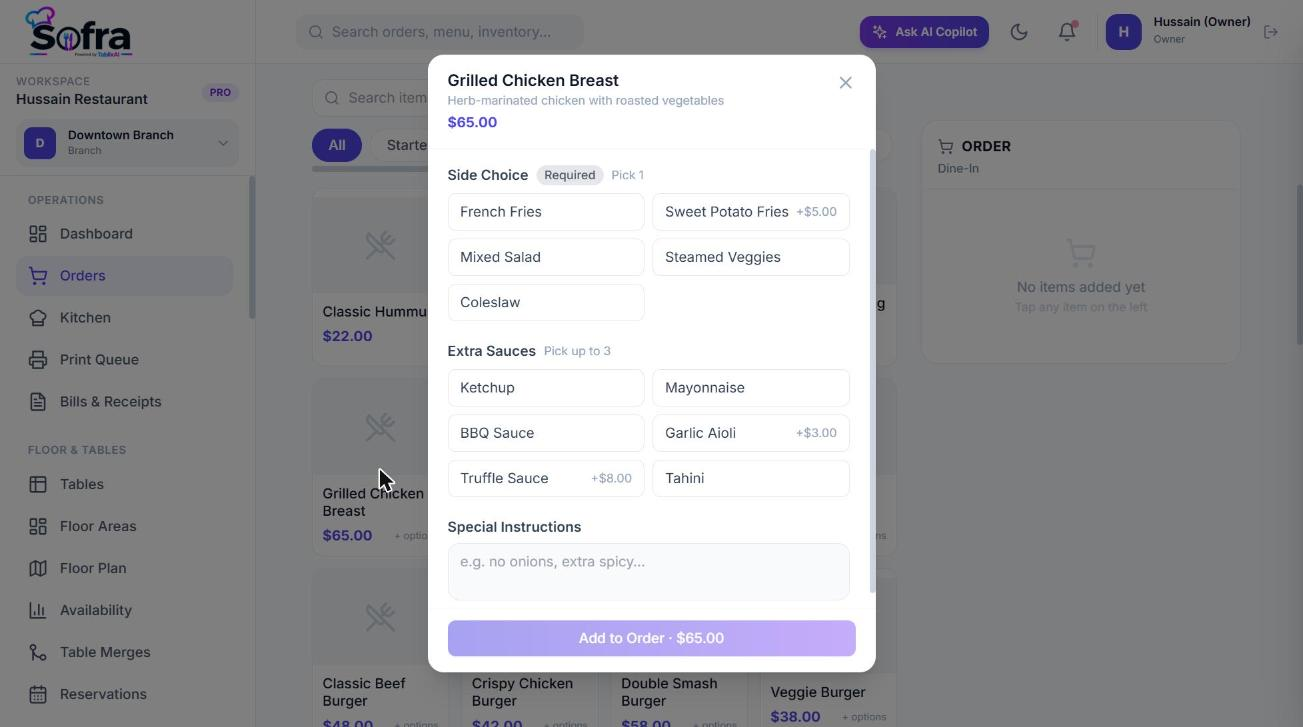
If the item has modifier groups, a picker opens. Required groups must be satisfied; each option shows its price. Add a note such as “no onions, allergy to nuts”.
- 3
Adjust the cart
Change quantities with plus and minus, or open an item’s menu to Edit Modifiers, Add Note, Item Discount, Change Price, Move Item, Cancel Kitchen (if already sent) or Void Item.
- 4
Add order details
Add order notes and kitchen instructions, choose a customer (search by name or phone), assign a waiter, set the guest count, and add a tip or packaging fee.
Attaching a customer
Search by name or phone and select a customer. For delivery you can pick one of their saved addresses. Completed orders update the customer’s visit count, total spend and last visit automatically.
Courses and priority
- An item given a course number above 1 is held and does not go to the kitchen until the course is fired from the kitchen screen. Use it for starters, mains and desserts.
- Items carry a priority (normal, high, urgent) that the kitchen can raise to push a dish to the front of the queue.
The action buttons
| Button | What it does |
|---|---|
| Hold | Saves the order without sending it. A held order releases its table. Resume it later from the Orders list. |
| Send to Kitchen | Marks the new items as sent and moves the order to Confirmed. On an existing order the button reads “Send N New” and sends only items not yet sent. |
| Re-send Full Ticket | Resets the sent flag on all active items so the kitchen sees them again. Use it if a printout was lost. |
| Discount | Order-level discount, validated against your role’s cap. |
| Coupon | Enter a promo code. |
| Pay | Opens the payment dialog. See Payments, refunds & voids. |
If a dine-in order has no table or a delivery order has no address, the screen tells you what is missing before it lets you place the order.
Order numbers
Each branch numbers its orders with the order prefix from its settings (default ORD) and a four-digit counter, for example ORD-0042. Numbers are allocated atomically so two terminals can never get the same number.
The Orders list
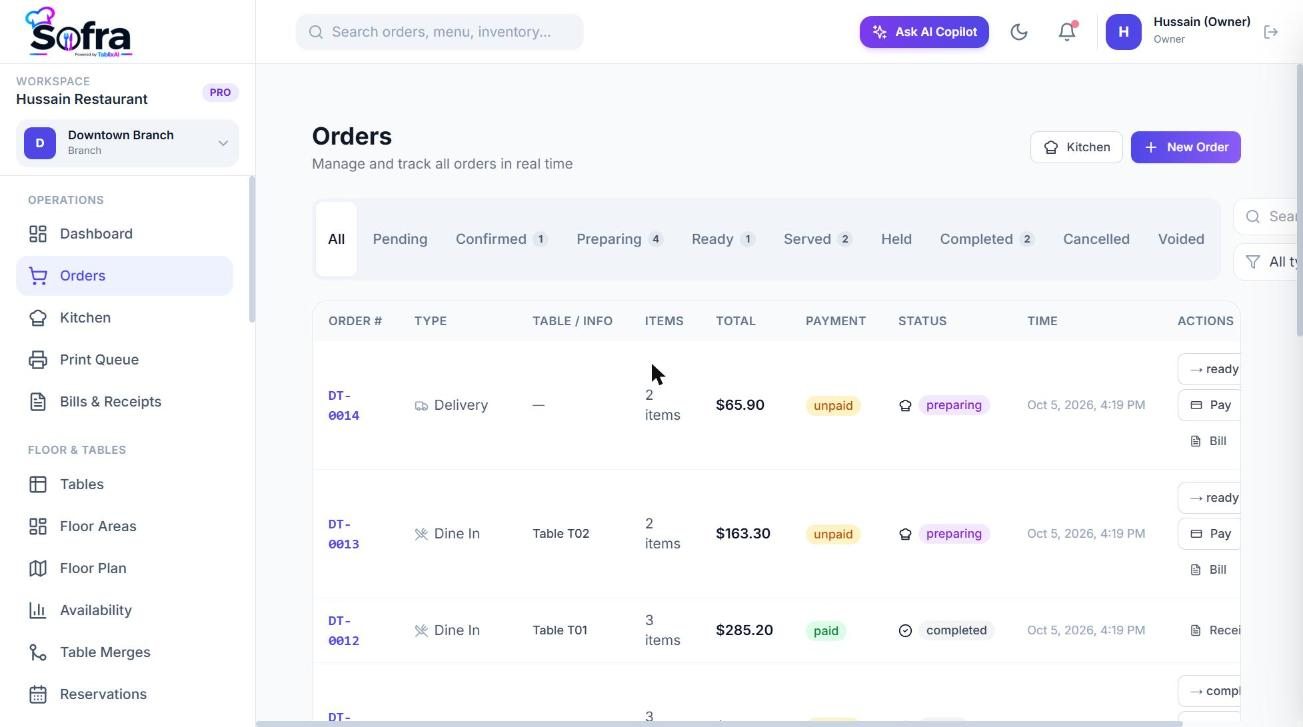
Operations → Orders lists orders for the branch with status tabs and live counts, a search by order number, and filters by type. It shows the table, customer, total and payment status, and opens the order page on click. Staff without orders:read_all see only their own orders.
Ready to try it?
Create a free account and follow along.